
This month I enrolled in the Adobe Education Exchange course Motion Graphics for Educators. I’ve been creating motion graphics for many years, but the class helped me better integrate the newest versions of Adobe Illustrator and After Effects.
WORKSHOP 1: CREATING A STORYBOARD
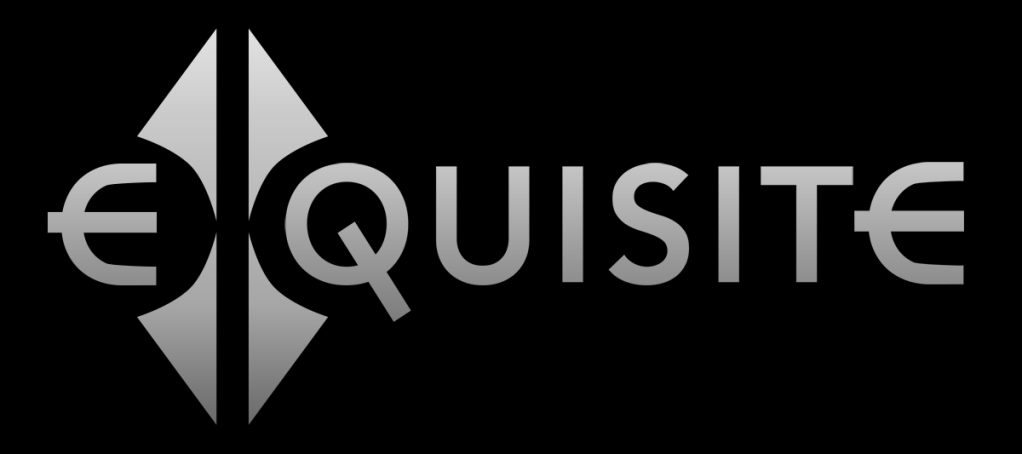
For this assignment, I chose to animate a logo that I recently created. Exquisite is a possible brand for a media design studio, and the animation can be used to promote motion graphics services.
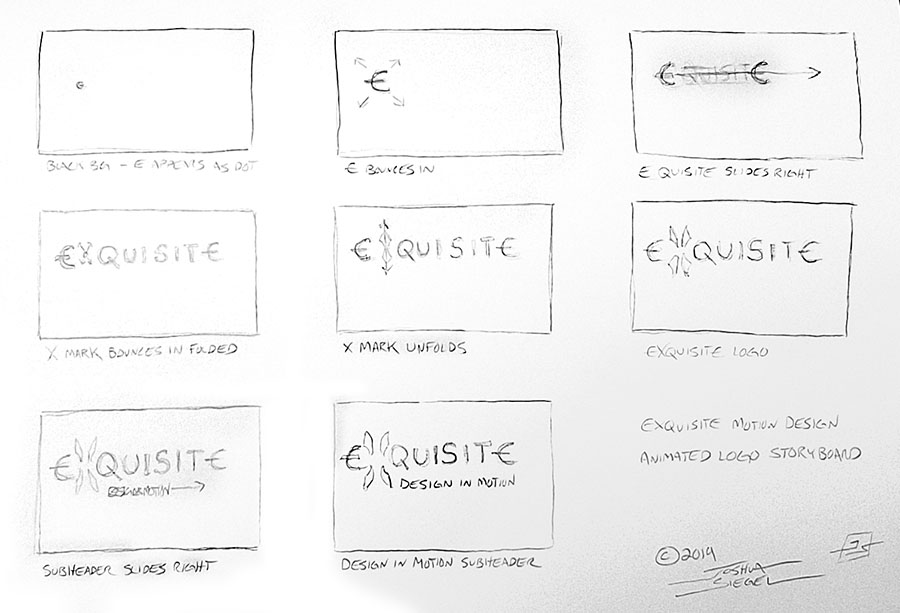
The entire animation will be about 6-8 seconds. As a filmmaker and motion graphics designer, I’m a big fan of storyboarding. It’s an excellent tool for planning shots and trying out ideas in rough form before you even start production.
This animation is relatively simple, but the storyboards will keep me on track when creating the vector assets and timing movements.
WORKSHOP 2 – CREATING GRAPHIC ASSETS
The Exquisite logo was already created in Adobe Illustrator, so I only had to add the assets to my Creative Cloud library and export PNGs to show on this page.


Next, we’ll be animating the graphics in Adobe After Effects.
WORKSHOP 3 – SET UP A MOTION GRAPHICS PROJECT
I created a new After Effects composition and imported the graphics assets. A still of the final logo helped me line up everything for the end of the animation.
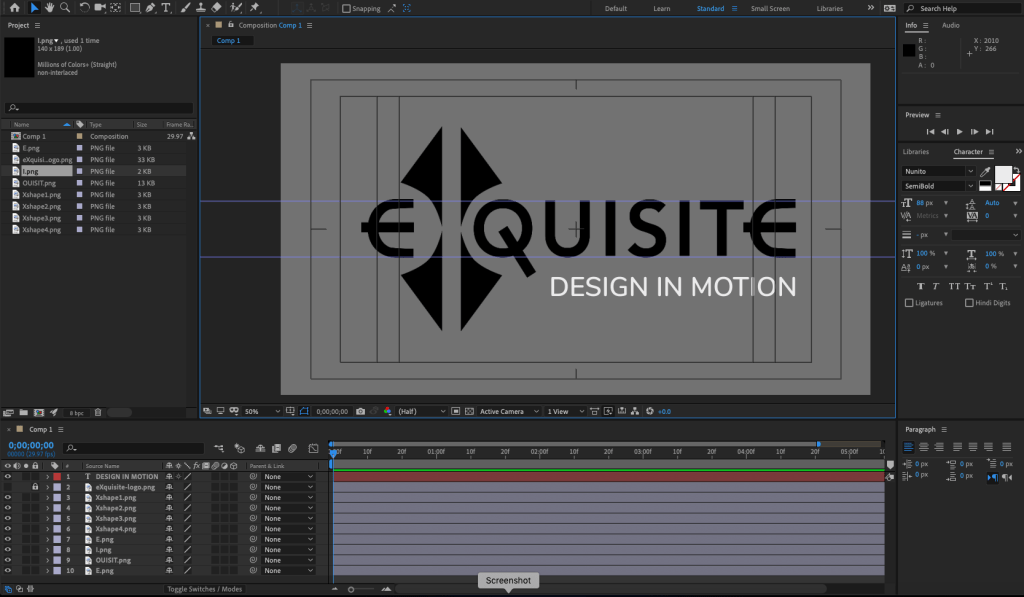
I set keyframes for the scale and position of all assets. Next, I will work backwards to the beginning of the animation.
WORKSHOP 4 – MOTION AND VISUAL EFFECTS
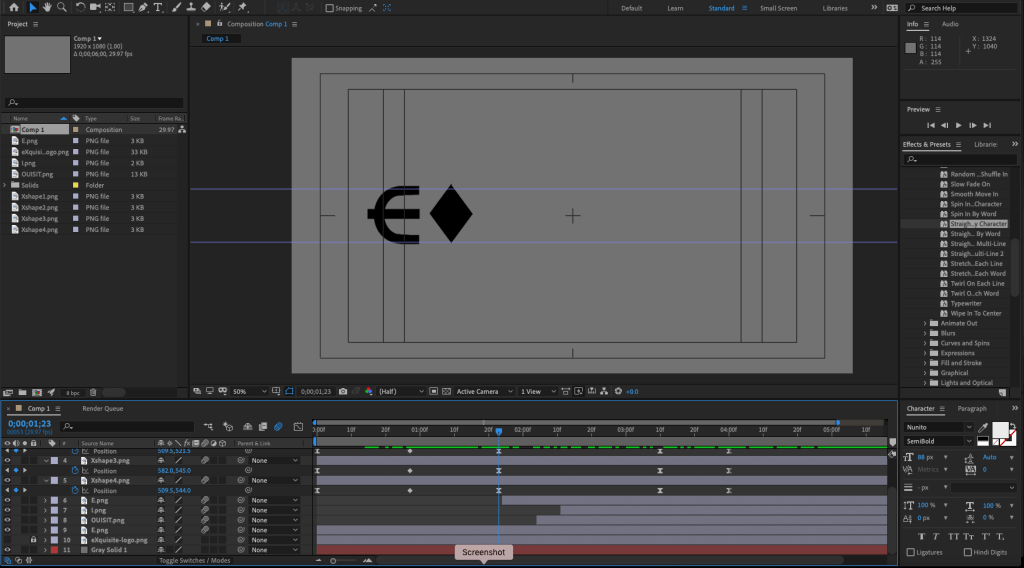
With all the visual assets in place, I animated each part starting with the subhead text. For the text reveals, I animated a mask with light feathering. The X logo assets were animated last. After adjusting the timing, I easy-eased the keyframes to make the animation smoother. Finally, I turned on motion blur for all the layers.
Moving forward with this project, I will experiment with colors, textures, and audio.
WORKSHOP 5 – CREATING A FINAL CUT
After experimenting with metallic textures for the text and background, I decided to keep it simple. I changed the background to dark gray and added a gradient ramp to the main logo. Finally, I added a dark vignette on top of all the layers. Overall the gradient gives the text a 2D lighting effect. On similar projects, I would consider using 3D lighting within After Effects for a more realistic look.
The animations needed some adjustment to make everything smoother and add a little life to the movements. Precomposing the X elements made it possible to add rotation and bounce to the diamond shape before it expands into the X.
The assignment asked for a voiceover, so I tried using my own voice and computer generated speech within Adobe Audition. I experimented with pitch shifting and reverb effects, but nothing felt appropriate for the project. Instead, I mixed a musical sting and a couple whoosh fx to use as the project audio.
This project was both fun and educational. It was good practice for creating vector assets in Illustrator, animating them in After Effects, and mixing audio with Audition. With these skills I can start making fun explainer videos for my classes.
